
Wu-Tang Clan in the Terminal
Hi everyone! It’s been a long time since I’ve updated my website (probably should more often…I’m paying for the hosting anyway…). Today I’d like to share with y’all something short and silly I made while trying to not think about my midterms. I’ve decided to try writing this in a tutorial format, with the intended readers being people who’re new to bash scripting.
Lately me and my roommate have been amused by the infamous Wu-Tang Clan name generator which you can find here. It’s good fun to see what output you get for various names, especially ones of friends (it’s weird how you can argue some of these names to be eerily accurate). Something I was particularly interested in was to see what happens if you run the name generator recursively. That is, assuming we has some function Wu-Tang, what is the ouput of Wu-Tang^4(x) for some name x. I figured it would be neat if I could find out what that was from the terminal, and set out on my journey.
Before we start, there’s a few terms I want to define really quick. You may have heard the terms standard output/input/error before. These will be key to getting our script to work. These terms refer to ‘file descriptors’ which are basically just an abstraction to let programs interact with files and file-like objects. The ‘standard’ file descriptors are a set of three file descriptors any program has access to by default. Standard Output let’s you print text to the screen. This is where you see most of the text on your terminal coming from. Standard Input is the default file descriptor a user will write to with their keyboard. So anytime you’re typing in some input to a program, you’re actually putting that input inside standard input. Standard Error is kinda like standard output, except it’s usually used for error messages (hence it’s name) or generally debugging output, which shouldn’t be mixed in with the normal output. We’ll see why this is important towards the end of this tutorial. If you want to see an example on your computer of these concepts, check out the program cat which can take standard input and copies it to standard output. Okay, still with me? Let’s move on to the actual scripting!
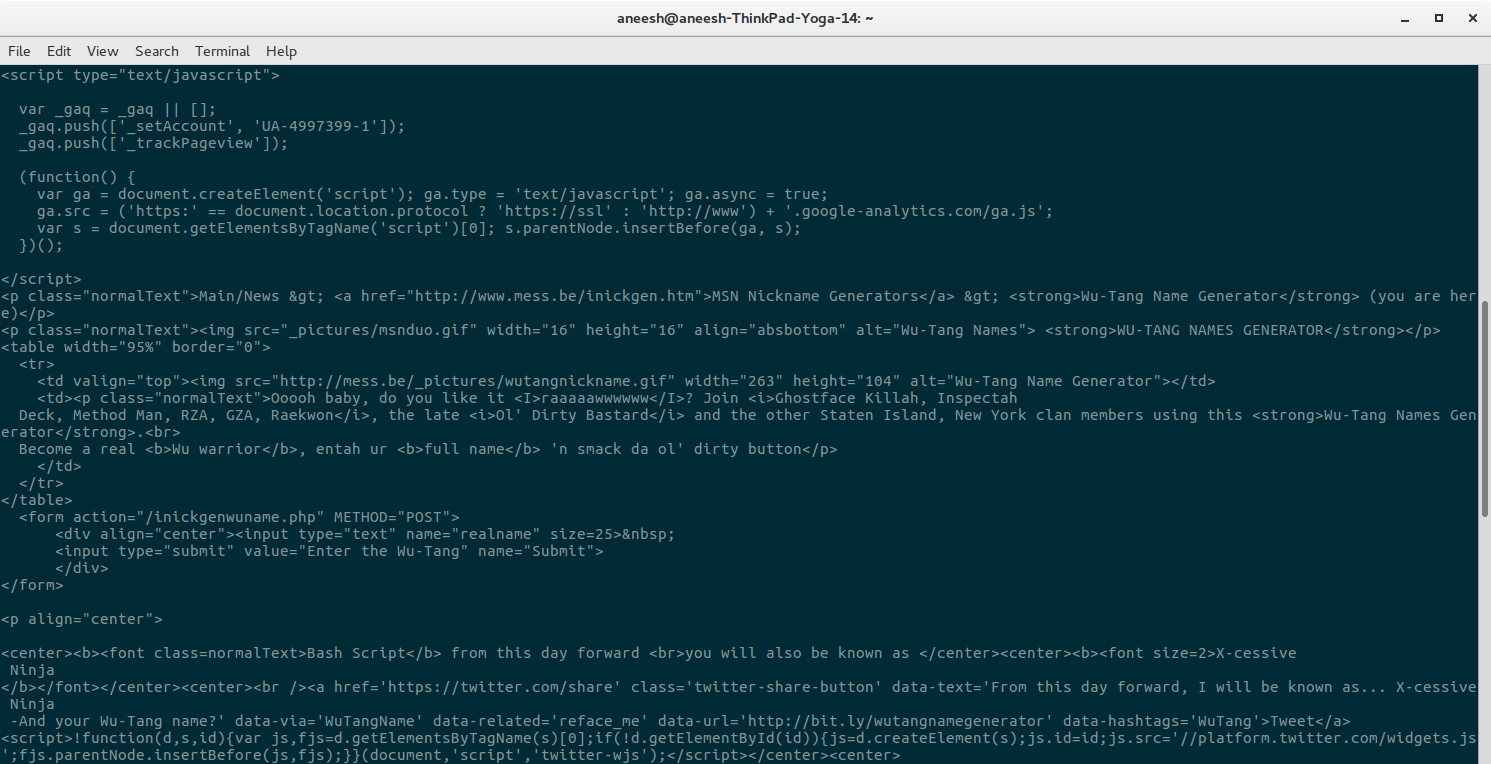
The first thing was inspecting the name generator’s website to see how it accepts input. This was fairly straight forward. Looking through the page’s source in firefox shows me:
<form action="/inickgenwuname.php" METHOD="POST">
<div align="center"><input type="text" name="realname" size=25>
<input type="submit" value="Enter the Wu-Tang" name="Submit">
</div>
</form>
We can see from this form that by hitting the button labelled Enter the Wu-Tang, we’re generating a POST request.
Then by using the network monitor we can take a look at how the POST request actually looks. To do this, just right click anywhere, click on Inspect element and go over to the network tab. Then, reload the page and submit some text in the form. You’ll see an entry towards the top with the ‘Method’ field set to POST. Click on that one, then click on ‘Edit and Resend’. You will see something similar to the following:
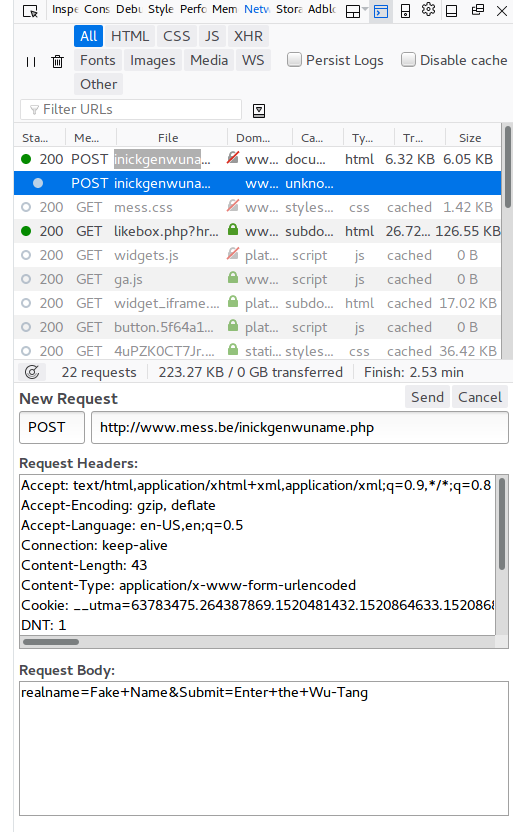
The parts that we should be interested in are the Content-Type field in the Headers and the format of the Body. The type specifies how the data is formatted so that the server knows what we’re sending. Note that there’s an additional field in the headers that lists all valid types that we can send.
In this example, the name that I had inputted was ‘Fake Name’. Notice how the space has been converted to a ‘+’. This is because it encodes the text sent using url encoding. Now, we can try to make our own request in bash. The command we will be using for this is:
curl -i -X POST -H "Content-Type: application/x-www-form-urlencoded" -d 'realname=Bash+Script&Submit=Enter+the+Wu-Tang' http://www.mess.be/inickgenwuname.php
curl is a really neat command line utility which can be use to generate network requests. You can also use it to download files, or view webpages.
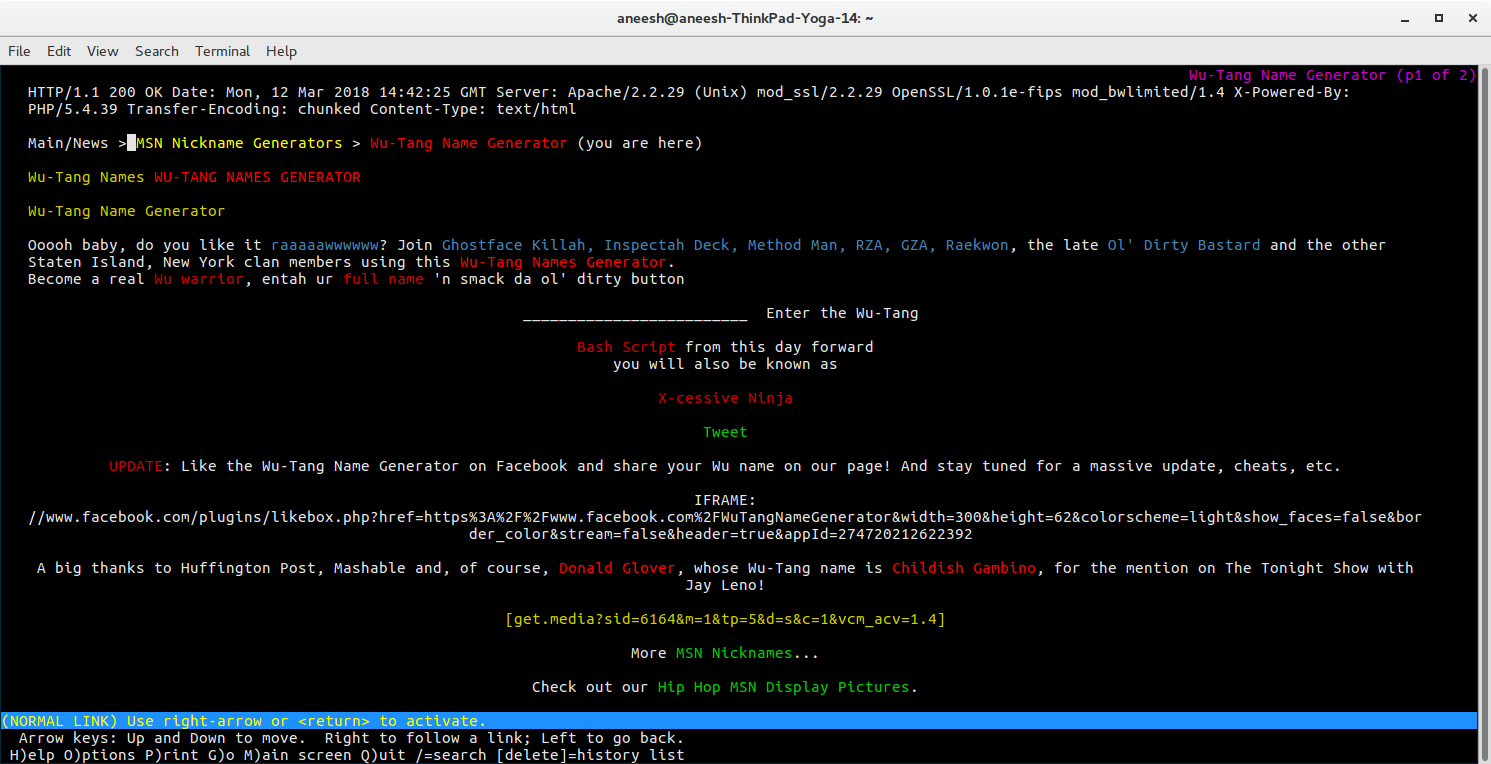
And we get the following output:
I’ve scrolled down to only include the relevant bits, but essentially the entire HTML source of the page has been dumped into my terminal.
Fun side note: If you have the program lynx installed (which is a command line web browser), we can it and view this source in a more pleasing format. We can do this by using the | (pipe) operator in bash, which will pipe the standard output of the first command into the standard input of the second.
$ curl -i -X POST -H "Content-Type: application/x-www-form-urlencoded" -d 'realname=Bash+Script&Submit=Enter+the+Wu-Tang' http://www.mess.be/inickgenwuname.php | lynx -stdin
Now we know how the output is supposed to look, so let’s try grepping for the word “From”, since we know the name will be in the phrase “From this day onward…”. We can use our trusty pipe operator again (we’ll need it quite a bit in the commands to come).

Huh, so that kinda worked, but we’re missing the second part of the name. This can be remidied by using the flag -A1 to get the following line from grep as well.

Now to get everything onto one line, we can use the program tr with the -d flag to delete all newlines.

You may notice that I’ve also used ; and thrown in an echo. The ; does what it does in many languages, it seperates statements and makes then run one after the other (kinda like the pipe, but it doesn’t move any data around between the two processes). The echo just prints out a newline so that the word ‘Ninja’ doesn’t appear on the same line as the next prompt. It’s a purely cosmetic thing that I threw in there to make the screenshot look better. It won’t be a part of the final script.
Now, we’re almost there! We just need to remove everything before the “…” and we’re good! Normally, I’d just use the program cut which is capable of splitting text on a certain delimiter (kinda like the split functions in python/js). For example:
$ echo "a.b" | cut -d . -f1
a
Here the -d flag tells cut what we want to use for the delimiter and -f1 says that we want the first field or collumn in the split version.
However, in our case, we want the last collumn, since the text is after the dots. Since getting the last collumn from cut is a little weird, we’ll just reverse the text and take the first collumn instead. We can reverse the text with rev and send that over to cut, before using rev again to get the output back to normal.

Finally, a minor cosmetic issue which plagues me is the weird space as the first character. Using tr would also delete the space in the name so instead we’ll use cut again. This time we’ll use the field flag with -f2- which means we want every field including and after the second one, but this also preserves the space that was in the text. Since our delimiter is a space, and bash uses spaces to seperate arguments, we’ll need to use a backslash before the space to let bash know that we want that space to be passed in as an argument

Lookin’ good! There are a few minor things that we need to address now:
- It would be nice if we could get
curl’s download information to go away. - We need to be able to take user input to put in any name into the generator.
The first one is quite easy. curl’s download information isn’t printed to standard out, its printed to standard error. This is why it still shows up, even though it doesn’t match the grep command. Now we can see why keeping standard error and output seperate is useful. Even when we’re consuming the output from stdanrd out, we can still see the debugging/error output. To get rid of it, we can redirect standard error to a special file called /dev/null. /dev/null isn’t actually a real file, but kind of a black hole that will throw away any input that you’ve put in. To do this redirection, we need to know the actual number of the file descriptor associated with standard error. To skip a few details, standard error is actually just the number 2. The redirection can be accomplished with the operator >. Using this we get the following.

Awesome! Now to tackle the second one. At this point I’m going to put this into a file and start making this a reuseable script. The file I’ll be using will be called wu-tang.sh but the name isn’t really important. These are the contents so far:
#!/bin/sh
curl -i -X POST -H "Content-Type:  application/x-www-form-urlencoded" -d 'realname=Bash+Script&Submit=Enter+the+Wu-Tang' http://www.mess.be/inickgenwuname.php 2>/dev/null | tr -cd '\11\12\15\40-\176' | grep -A1 From | tr -d '\n' | rev | cut -d . -f1 | rev | cut -d \  -f2-
You’ll notice that the first line which starts with #! is new. It tells our system what program should interpret the commands to run. The default shell is sh. Although I’m using bash which is a superset of sh, I’m not using any bash-specific features. On many systems, sh is just a pointer to bash.
Now, we’ll want to put the name in there. First, we can get all of the command line arguments as a string using $@. In bash, $ is an operator to indicate the the following word is a variable name. For example:
$ var="Hello World!"
$ echo $var
Hello World!
Here the first $ in the line is just convention to represent the prompt in your terminal.
There are a few variable name that are special. For example, $1, $2, $3, ...$ all refer to command line arguments. $@` is a special variable that combines all arguemnts together into one, space seperated, string.
Now, we just need to replace all spaces with ‘+’. We can reprise our command tr although we used tr earlier to delete characters, tr’s true purpose is to replace some character with another one. So in this case we use tr \ + (notice the escaped space) to replace all spaces with ‘+’.
Finally our script looks like this:
#!/bin/bash
name=$@
name=$(echo $name | tr \  +)
curl -i -X POST -H "Content-Type:  application/x-www-form-urlencoded" -d 'realname='$name'&Submit=Enter+the+Wu-Tang' http://www.mess.be/inickgenwuname.php 2>/dev/null | tr -cd '\11\12\15\40-\176' | grep -A1 From | tr -d '\n' | rev | cut -d . -f1 | rev | cut -d \  -f2-
To get tr to work with the name we use the syntax $(command). This is called a subshell, which runs the comand inside and returns the output. I also have an extra tr that removes some weird non-printable characters that I was occasionally seeing on some outputs. Now to make this script executable, use chmod +x wu-tang.sh which gives it the appropriate permission to run.
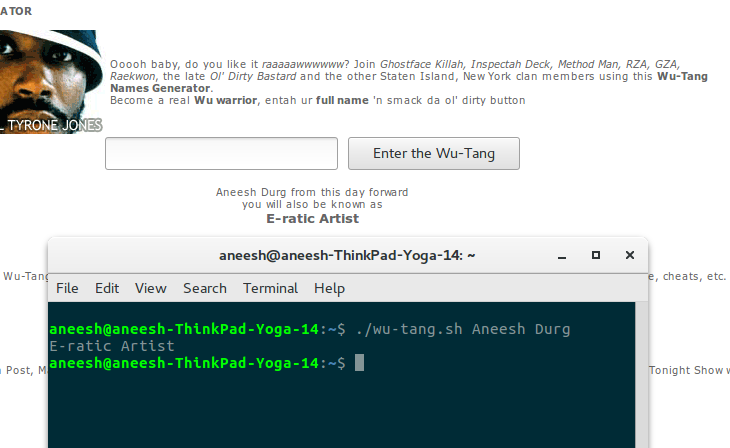
We’ll just test this script and compare it against the website.
The last step is to make it possible to run this from the command line as wu-tang [name](without the ./ we had before). For this, I’ll define an alias in my .bashrc. The .bashrc is a file located in your home directory which is a series of commands that are run everytime you open up your terminal. An alias is just a shortcut for any program, or bash commands. I only need to add the following line:
alias wu-tang='~/wu-tang.sh'
And I’m done! Now I can run it as wu-tang [name]. Now I can use a variable and a for-loop as demonstrated below to run this 10 times with each input being the output of the previous iteration like I wanted to.
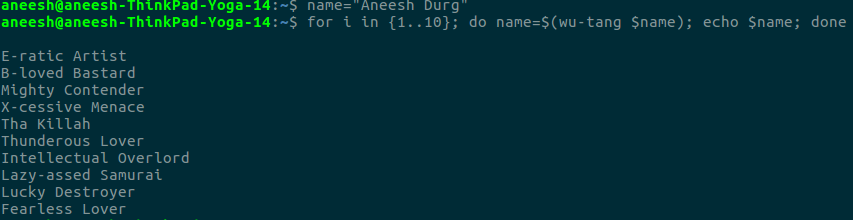
Note that I’m free to use the variable name without affecting the script, since the variables are in different scopes.
This could still be improved. I’m only replacing ‘ ‘ with ‘+’ in the names without going through the hassle of url-encoding the input. I leave that as an excersice to the reader ;)
And that’s it for this post! Hope you all liked it, and possibly even learned something!