
Building a keyboard (part 1)
I’ve built some mechanical keyboards before, but maybe it’s time I built one from scratch.
Previously, I’ve followed build guides and assembled my own iris v2.
It’s been my daily driver for the last two years or so, and while I love it, I’ve been itching for an upgrade.
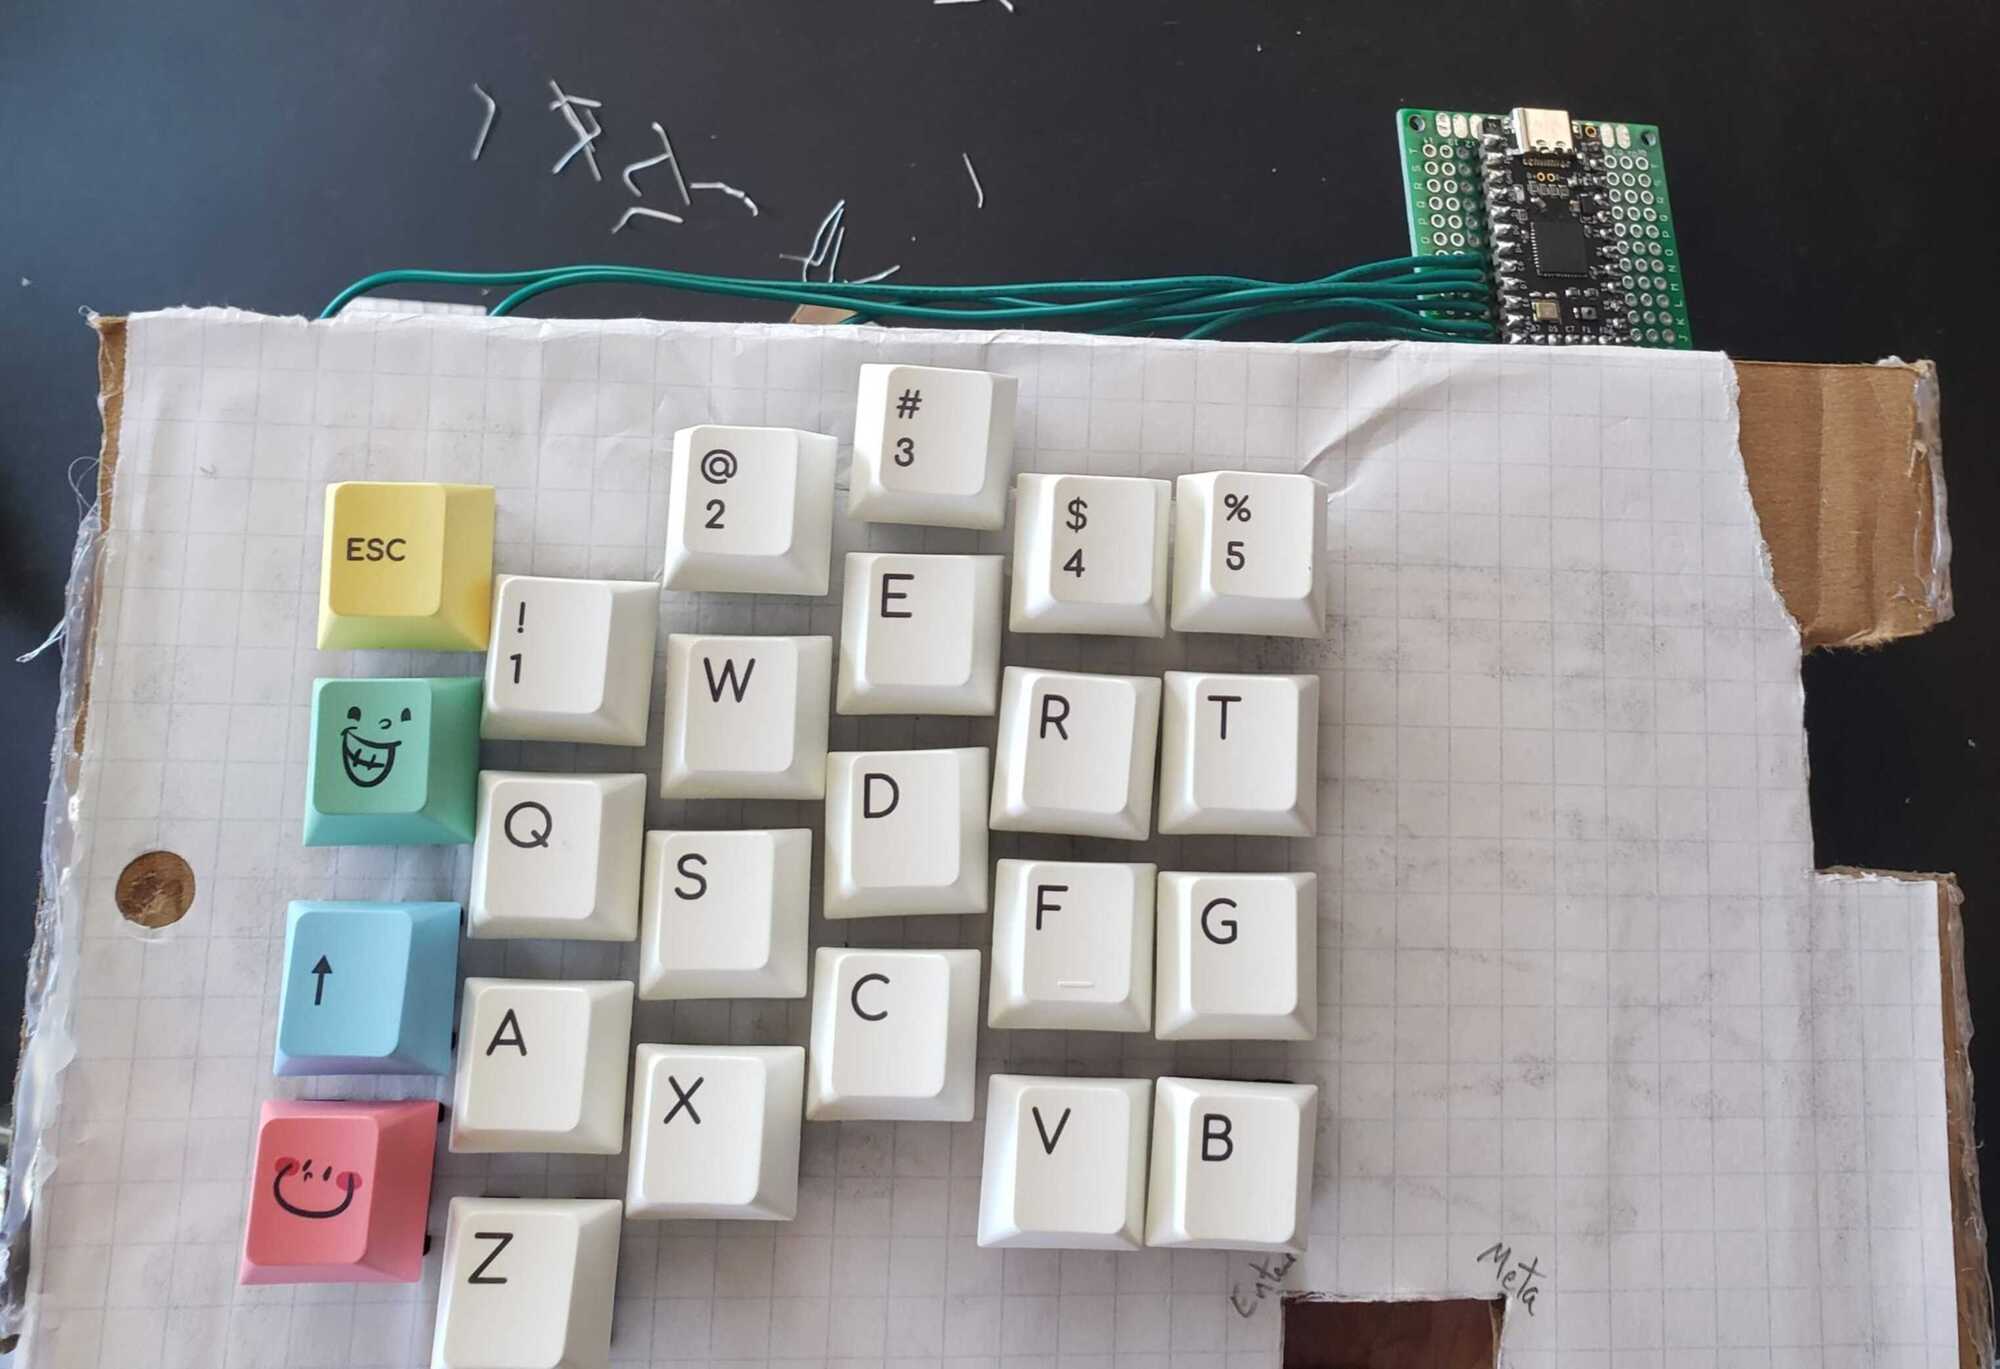
Having seen some posts on r/mechanicalkeyboards about handwiring, I decided I wanted to try my hand at making a super fancy custom keyboard. I came up with the following layout and cut it out of a piece of cardboard:
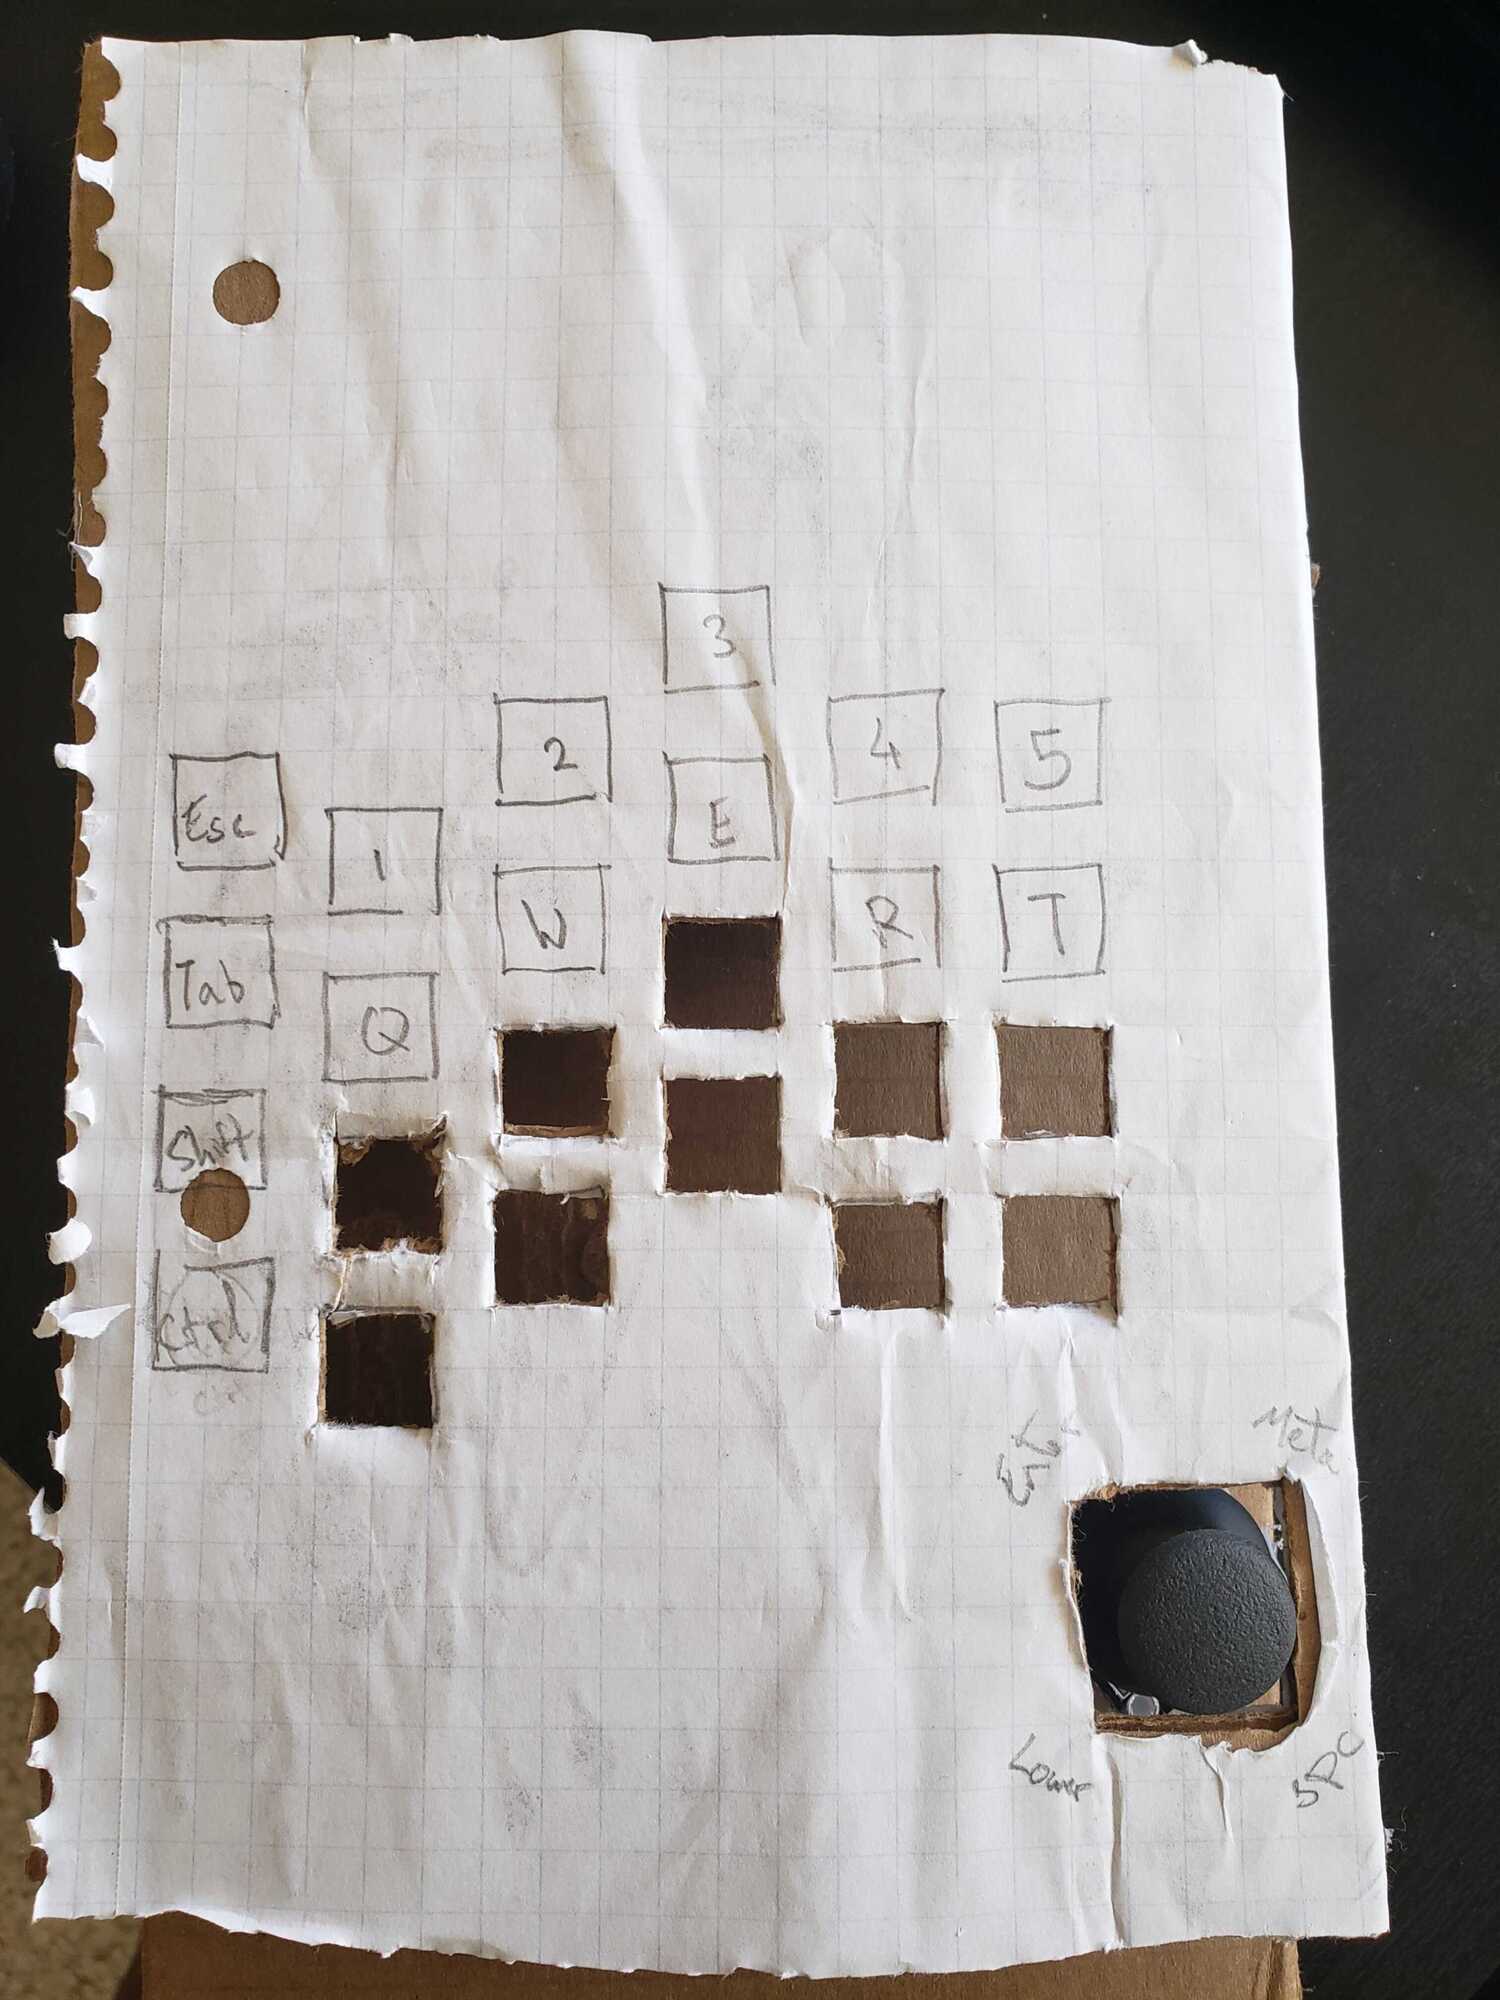
Instead of having a thumbcluster, I wanted to use a joystick, where different directions would correspond to different keypresses.
This initial piece had the keys too close together, so I started over on a different piece of cardboard, but the general shape was the same.
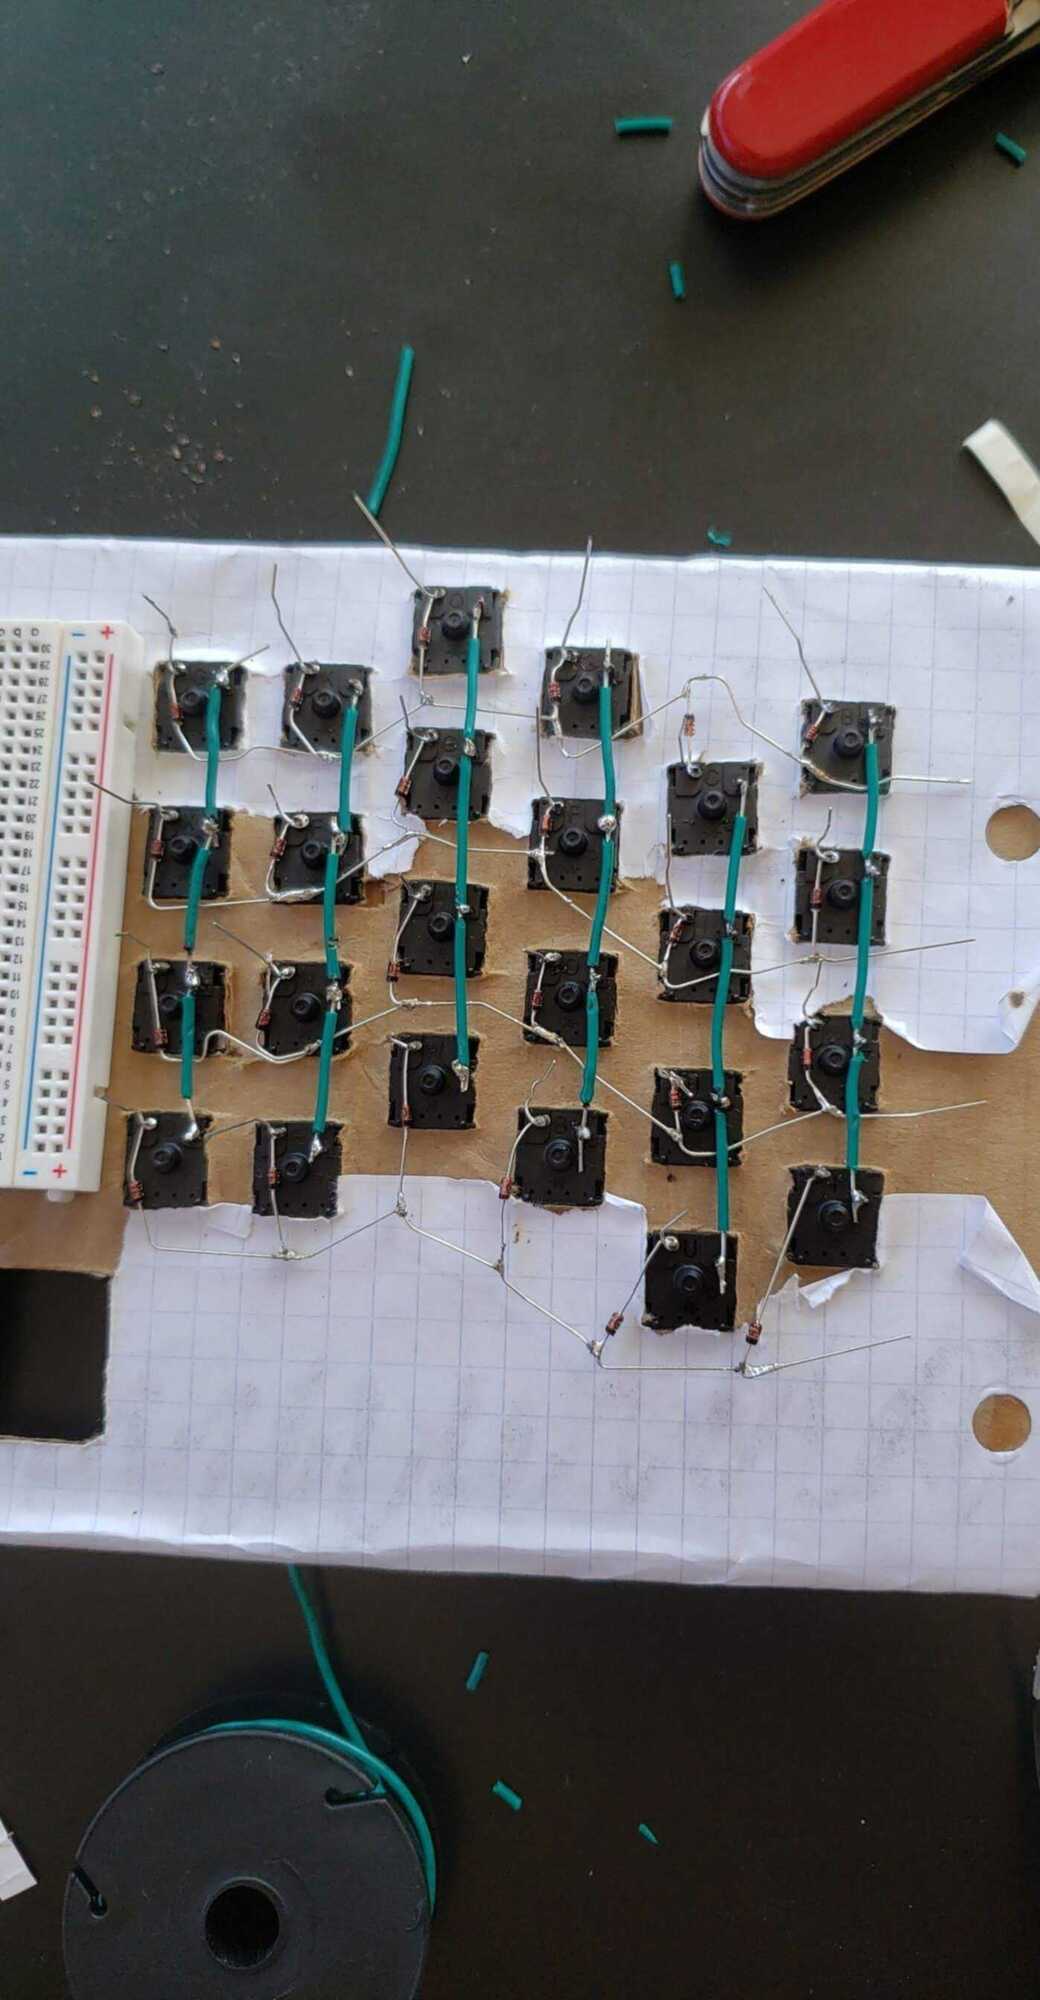
Following the QMK guide on handwiring, I wired up some keys:
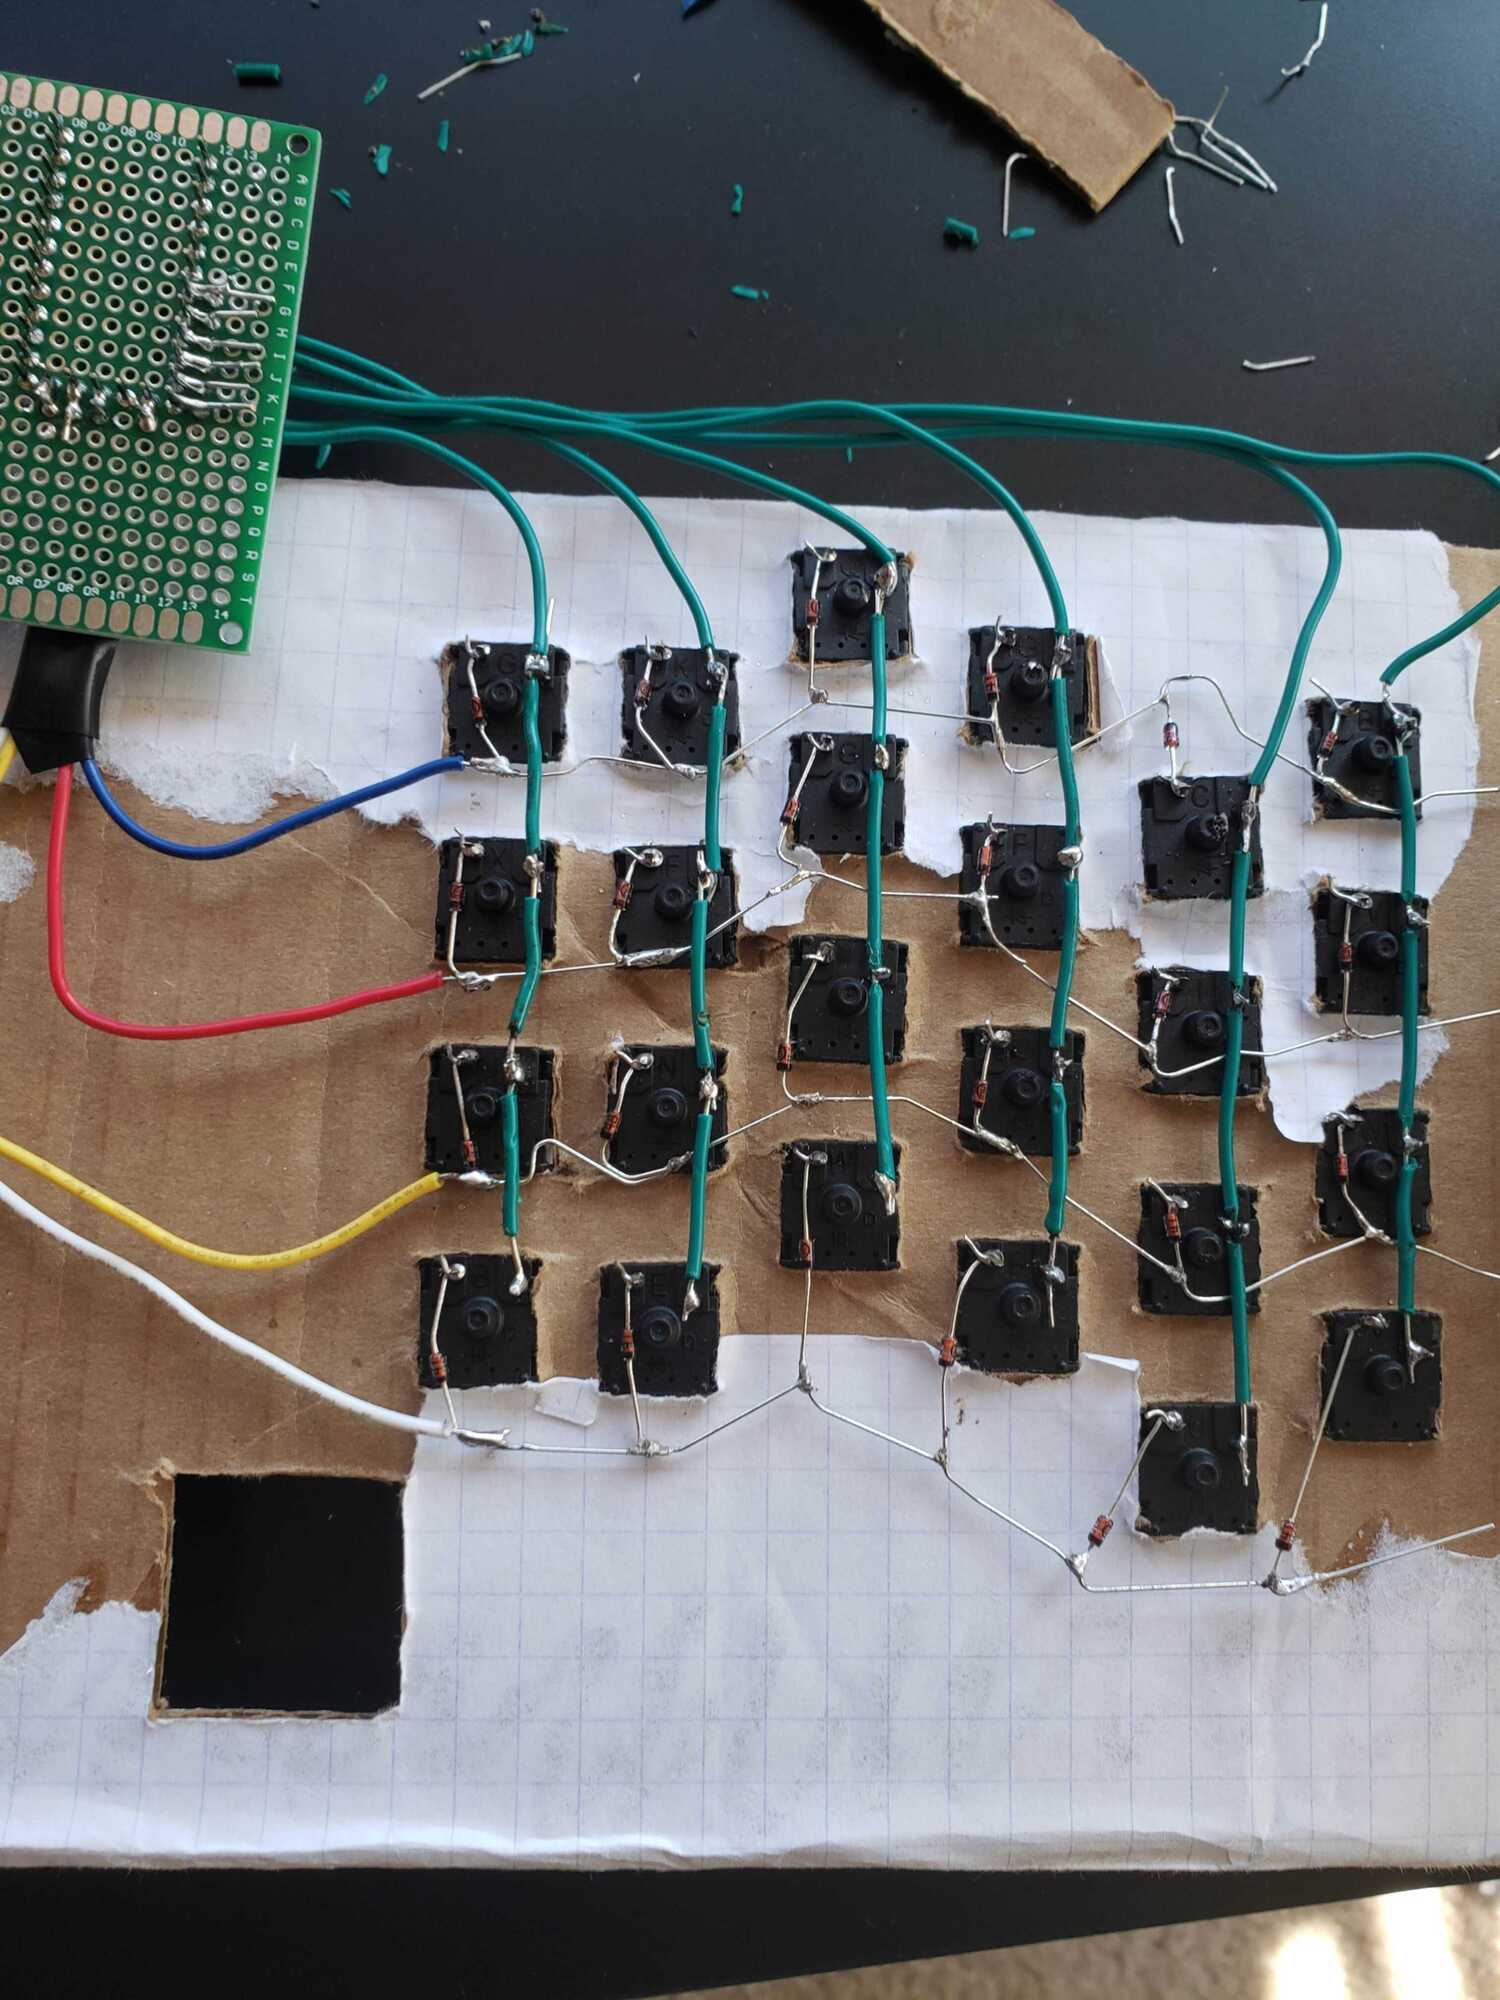
…and connected them to a PCB holding an elite-C. I’m using an elite-C for the controller since it’s got that sweet USB-C connector and is backwards compatible with arduino pro-micro, which is very well supported.
The view from the front:
To make sure I got everything right, I copied the 2x5keypad firmware in QMK
(link here)
into a new directory,
and modifed the files to match the pins I used and to assign the layout I
wanted.
Here’s a quick demo of it working
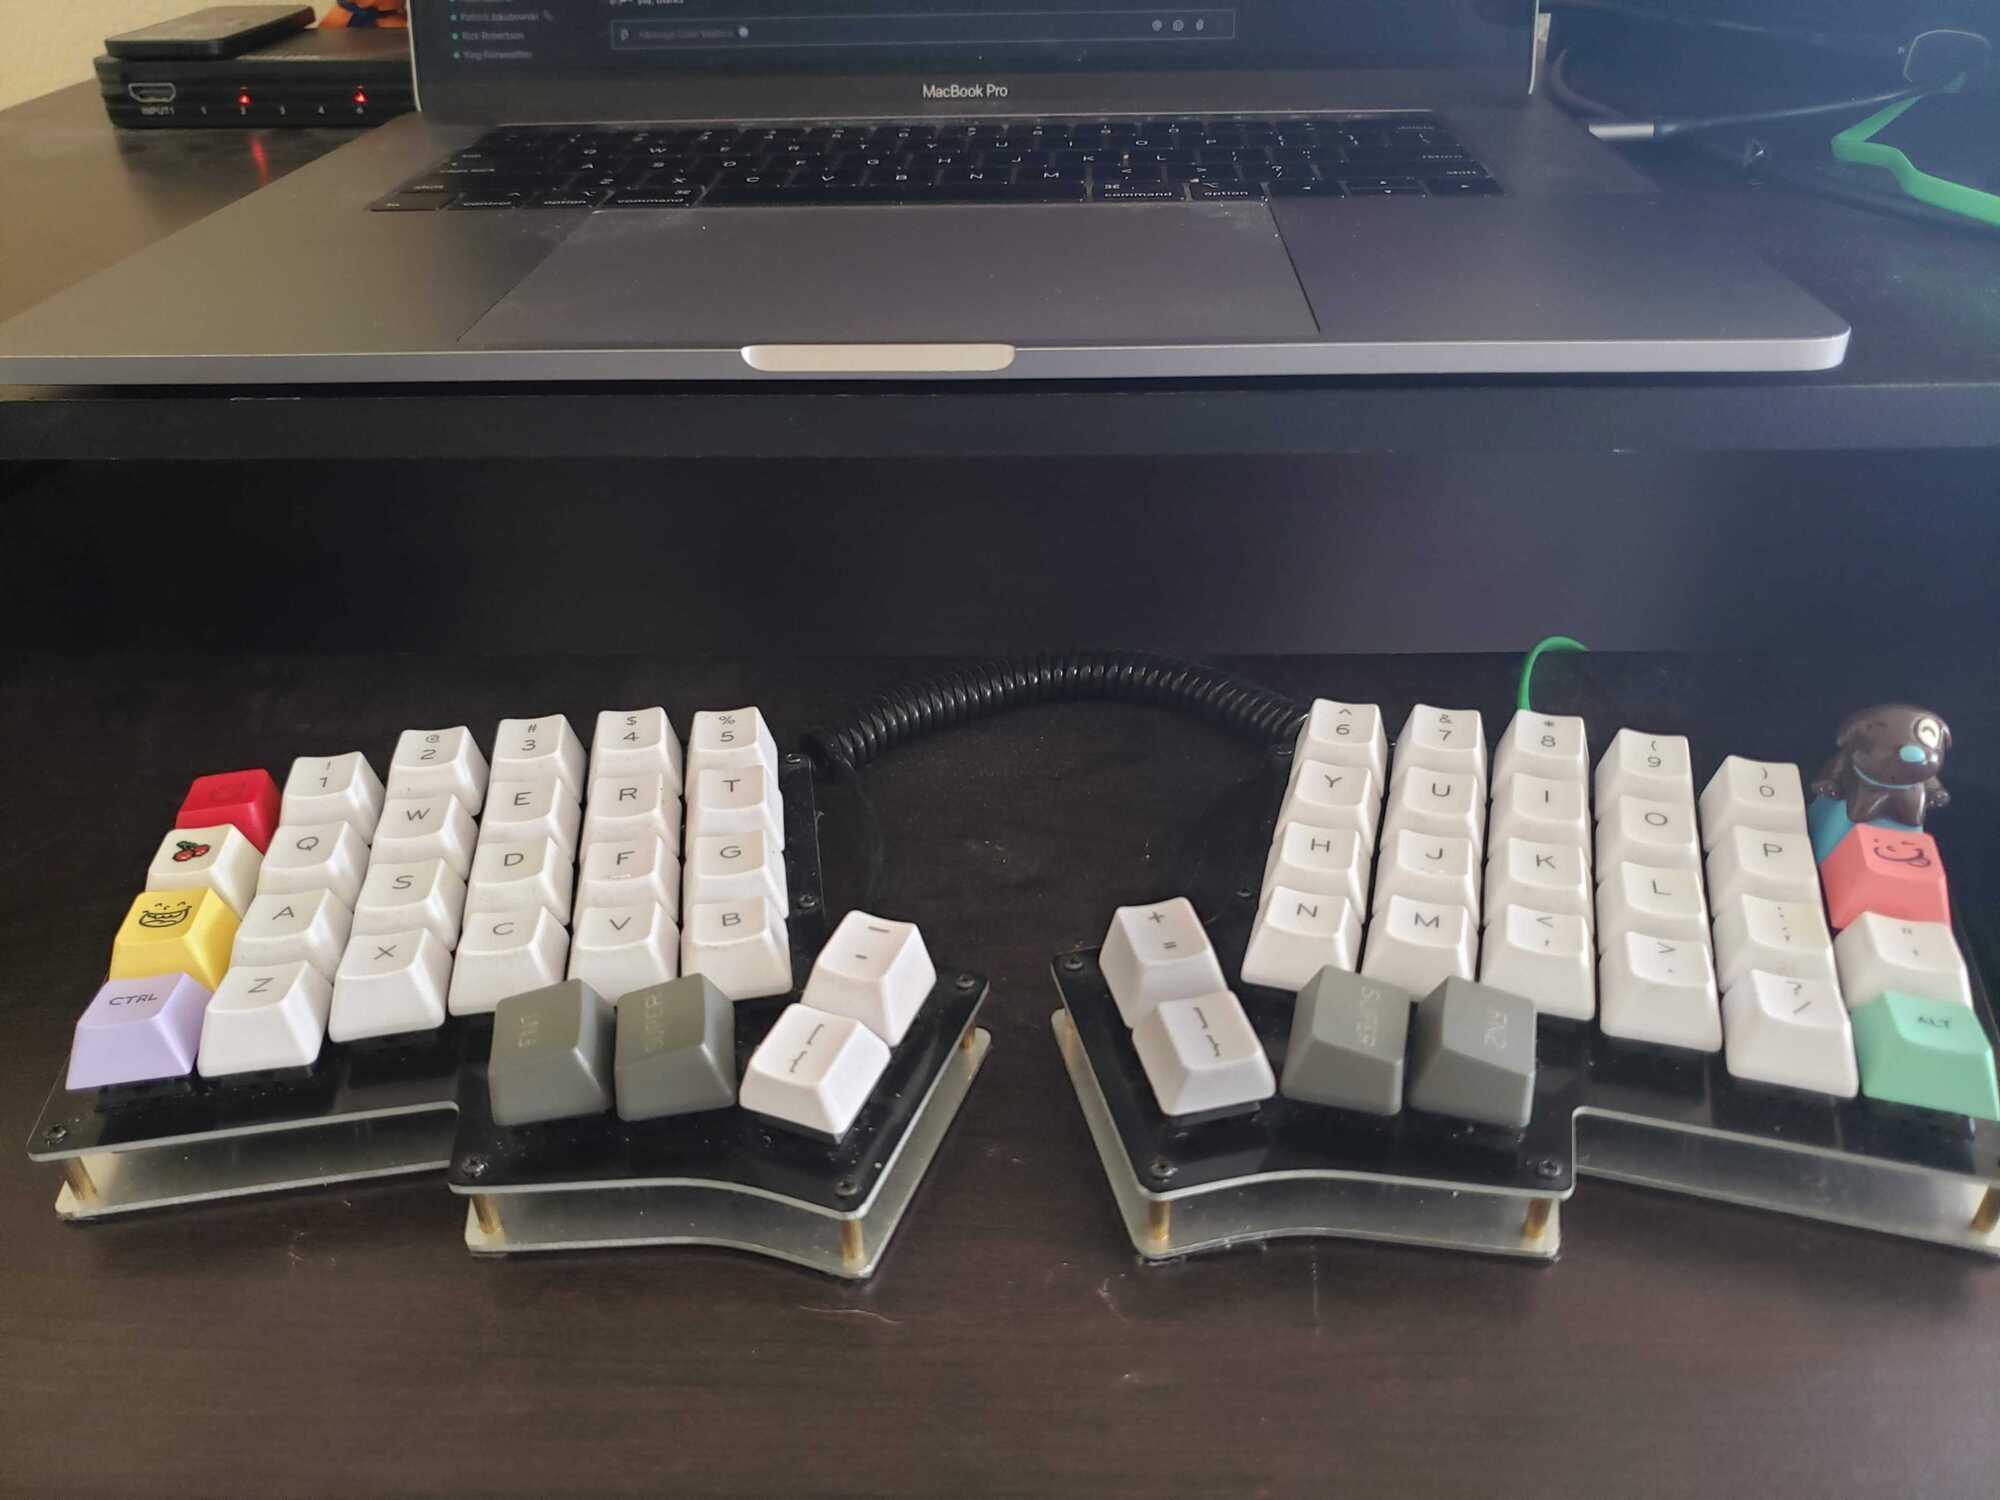
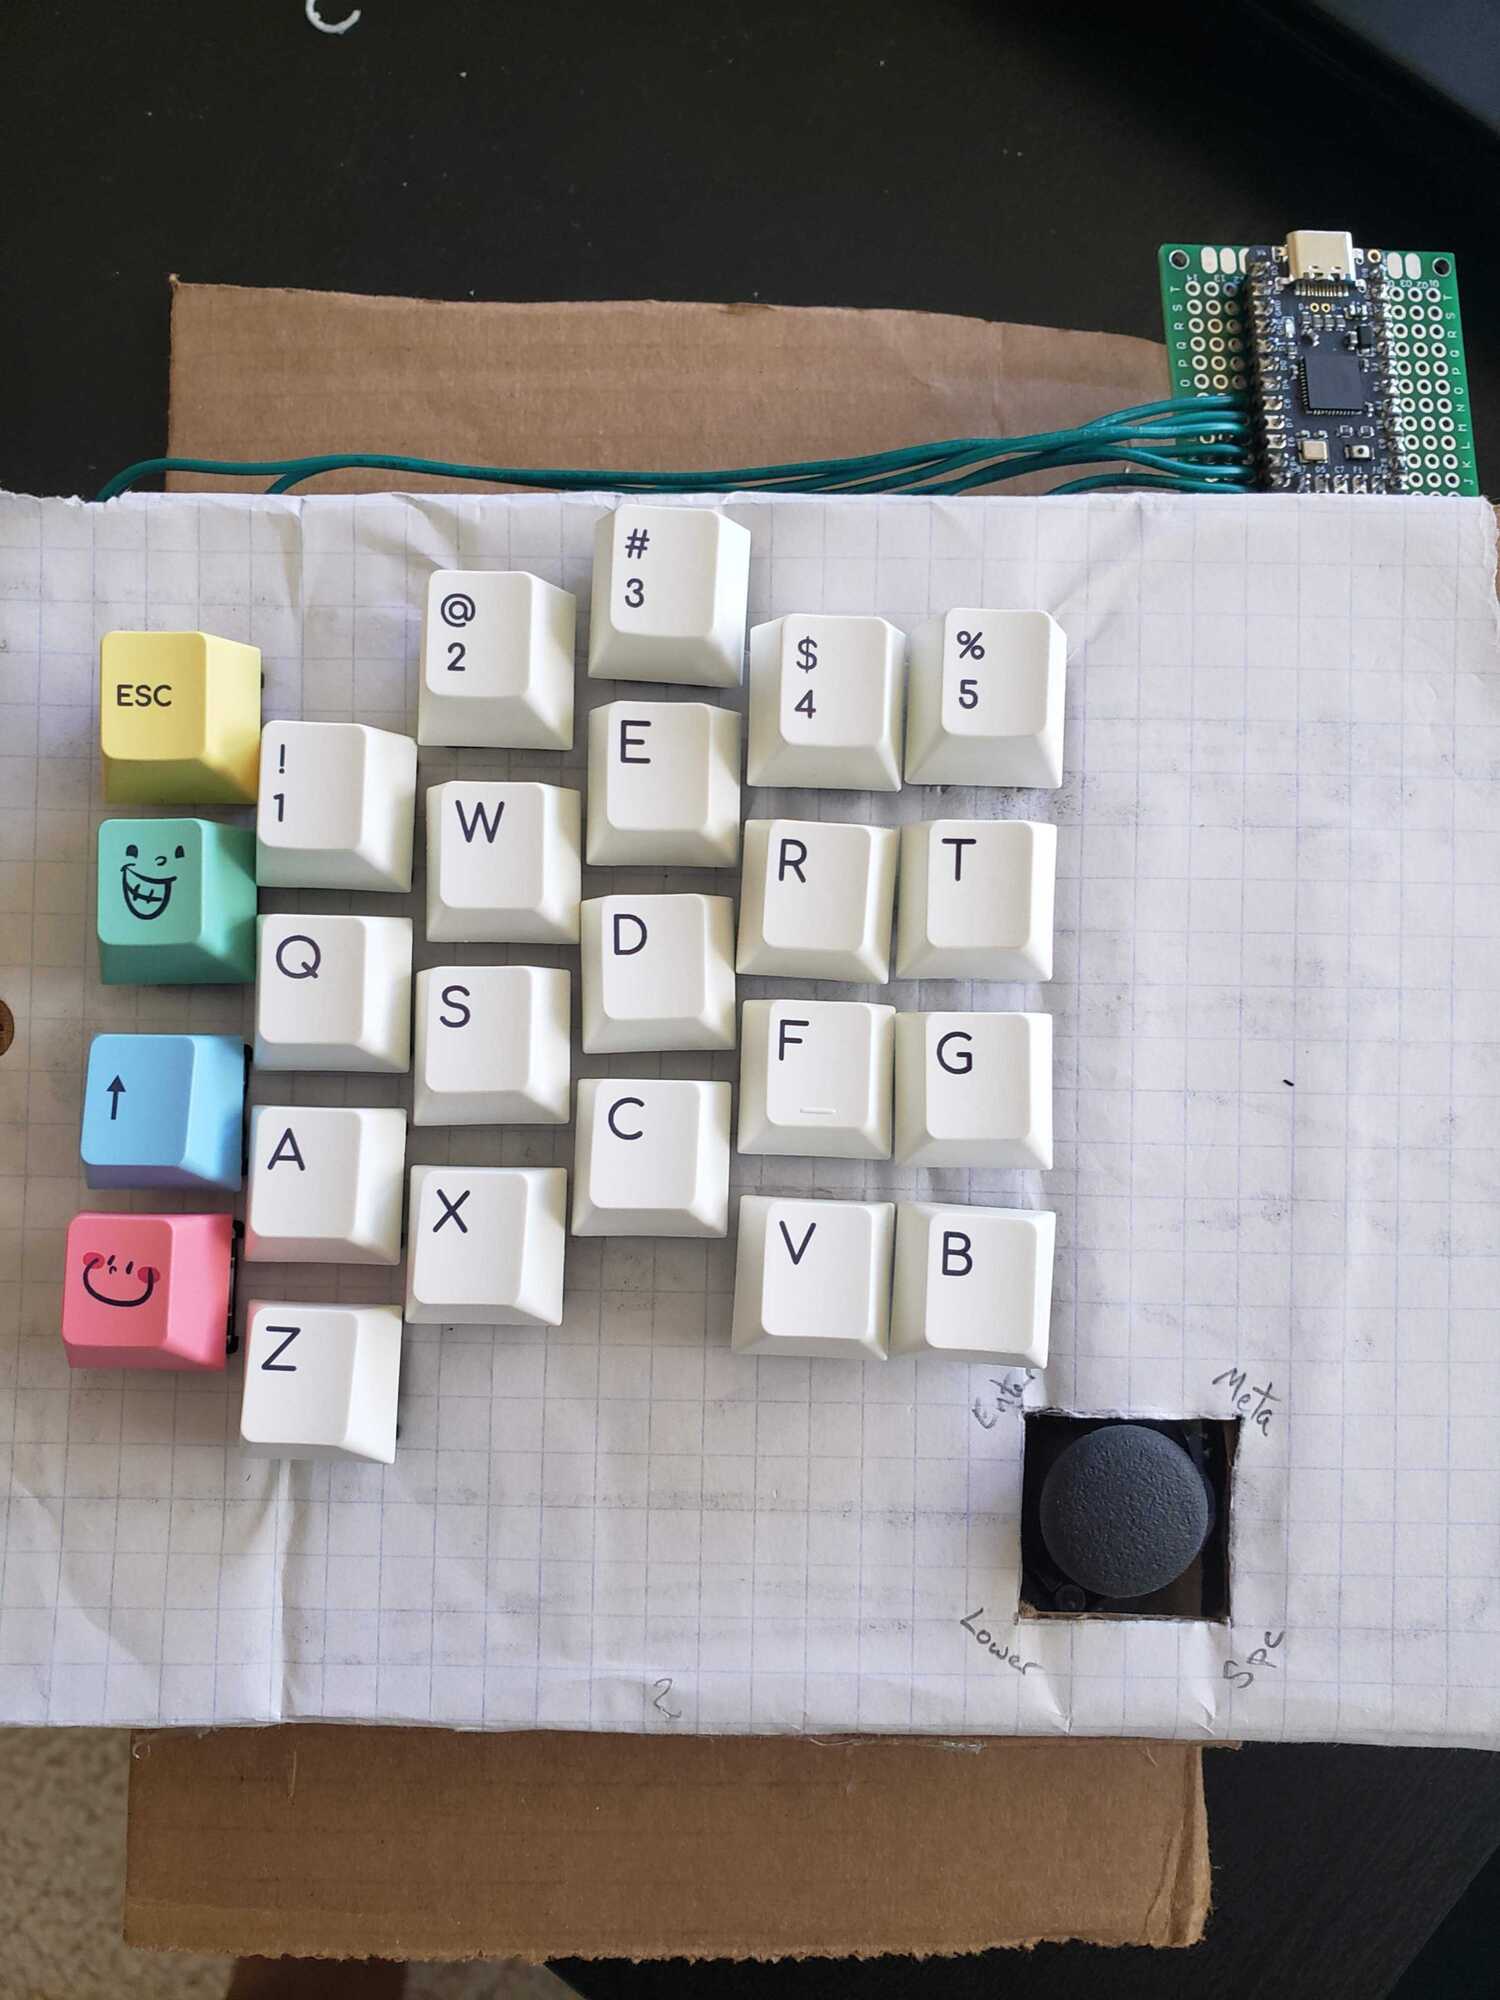
And here’s a picture of what it looks like now:
The next post will probably be about getting the joystick to work. Eventually, I’d also like to build the right hand, use a TRRS cable to connect the two halves, 3D print a case and/or get a custom PCB, and finally, use this layout as my new daily driver.